XEO is designed to make common Web-development tasks fast and easy. Here's an overview of how to write a XEO Application.
The goal of this document is to give you a bit of technical specifics to understand how XEO works, but this isn't intended to be a tutorial or reference; we have that, though check the XEO Library tutorial or the technical documentation at the XEO Wiki.
This document assumes you have a working installation of XEO Studio and a newly created project with a XEO Package named OVERVIEW$1.0.
The goal is to make an application that will let you manage books and their authors. You'll be able to create books and authors (and relate books with authors) and include some customization (by using XEO's Java API).
The first step is modeling this simple application, see figure 1 bellow.
XEO Overview
Modeling

Figure 1 - Entity-Relationship Diagram for the Overview application
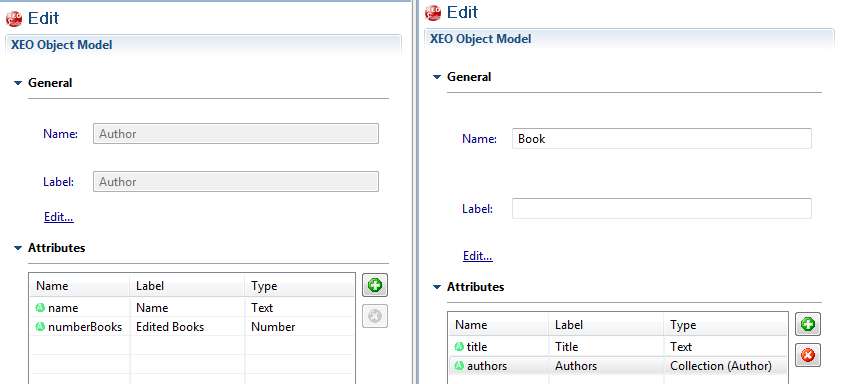
A Book entity has a title attribute (textual) and the Author entity has a name attribute. The Book entity has a relation to authors (each book can have any number of authors).
Go to XEO Studio and create a new XEO Model named "Book" in the OVERVIEW$1.0 package, go ahead and create an "Author" XEO Model as well (in the same package), then add a textual attribute named "title" and a collection attribute named "authors" (relating to the Author XEO Model) and add a "name" attribute (textual) and a numberBooks attribute (numeric), like depicted in figure 2.
Go to XEO Studio and create a new XEO Model named "Book" in the OVERVIEW$1.0 package, go ahead and create an "Author" XEO Model as well (in the same package), then add a textual attribute named "title" and a collection attribute named "authors" (relating to the Author XEO Model) and add a "name" attribute (textual) and a numberBooks attribute (numeric), like depicted in figure 2.
Add Logic (Restrictions and Behavior)
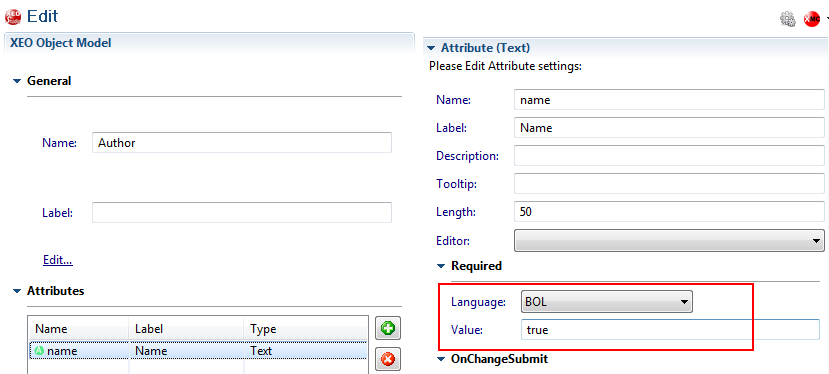
Next you'll add a bit of restriction and behavior to these XEO Models. One really cool XEO feature is how easy it is to declare a required attribute in a XEO Model, you just need to select an attribute and scroll to the required section and choose "BOL" as the language, and type "true" (you can also use Java, but XEO provides a simple expression language (BOL) to allow you to declare logic/behavior in XEO Models). Change the name attribute in the author XEO Model, like depicted in figure 3.
Next, you'll make use of XEO's Java API to add some behavior to the application.
The logic for this method is to check if the book instance is related to any number of authors, and if it is, increment the number of books of that author. The code to do that is the following:
public boolean onBeforeCreate(boObject obj,boEvent event) throws boRuntimeException {
Use the Java API
XEO provides an easy to use Java API so that you can interact with XEO models instances and their attributes. XEO also provides a set of points where you can use that API to implement your logic (like a set of predefined events). To show an example of the Java API, you'll add an event that occurs before each instance is saved and that event will update the number of books written by an author. To do that go to the Events section of the Book XEO model and add an OnBeforeCreate event (which will be executed right before an instance is first created), and press the Edit Button. This will trigger the creation of a Java class with a method signature for you to implement (the method signature is the following).public boolean onBeforeCreate(boObject obj,boEvent event) throws boRuntimeException { return true; }
The logic for this method is to check if the book instance is related to any number of authors, and if it is, increment the number of books of that author. The code to do that is the following:
public boolean onBeforeCreate(boObject obj,boEvent event) throws boRuntimeException {
    if (!obj.exists()){
        //Retrieve the collection attribute
        bridgeHandler authors = obj.getBridge("authors");
        //Position the list in the first position
        authors.beforeFirst();
        //Iterate through all elements
        while (authors.next()){
            //Retrieve the current object
            boObject currentAuthor = authors.getObject();
            //Retrieve the handler for the attribute
            AttributeHandler numberBooks = currentAuthor.getAttribute("numberBooks");
            //Retrieve the attribute value
            Long currentNumber = numberBooks.getValueLong();
            //Check if the value is not null
            if (currentNumber != null){
                //Increment the number
                currentNumber++;
                //Set the value
                numberBooks.setValueLong(currentNumber);
            }
            else
                currentNumber = Long.valueOf(1); //If the value is
        }
        return true;
      }
      return true;
    }
Views (Scaffolding)
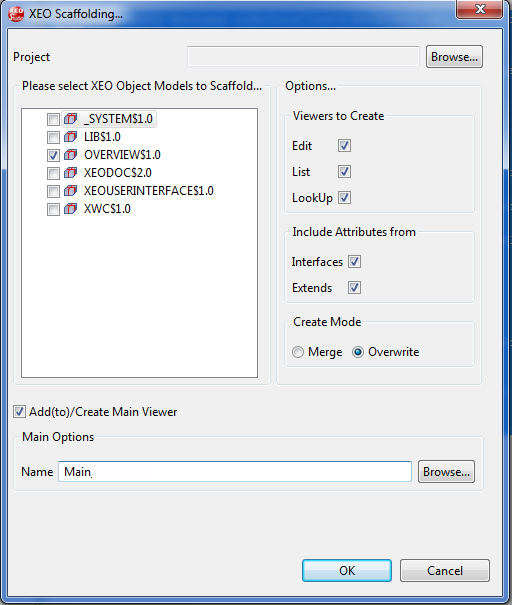
In this phase you can now scaffold your viewers (from the XEO Model definitions) to speed up the development. Go to the "XEO Studio" menu in XEO Studio and select "Utilities" -> "Scaffolding", the window depicted in figure 4 should appear (select the same options and press "Ok").
Launch the Application in Eclipse and open your browser, type the following address: http://localhost:8888/xeo/Login.xvw and login with "SYSUSER"/"ABC" (without quotes).
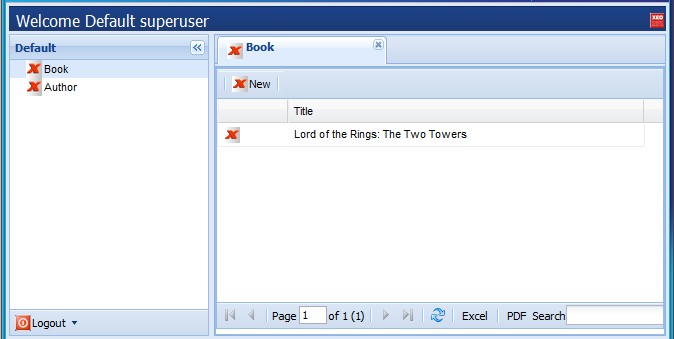
You should see Main viewer as depicted in figure 5.
You should see Main viewer as depicted in figure 5.
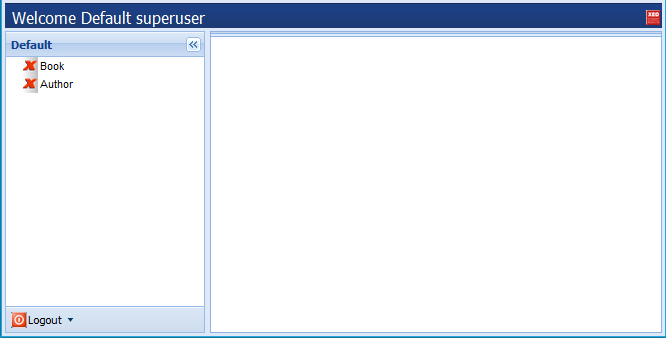
If you press the "Book" entry in the left menu the list viewer for the "Book" XEO model will be displayed, as depicted in figure 6 ( your list should be empty, the one in figure 6 already includes a book that was previously created). The "cross" icon can (and should) be replaced with your own icons, you can read the documentation to learn how to do that.
If you press the "New" Button in the Book List viewer, it will open the Edit viewer for a new instance of Book (see figure 7), notice how the title attribute is marked in red (required). If you try to save a book without title, it will show an error message.
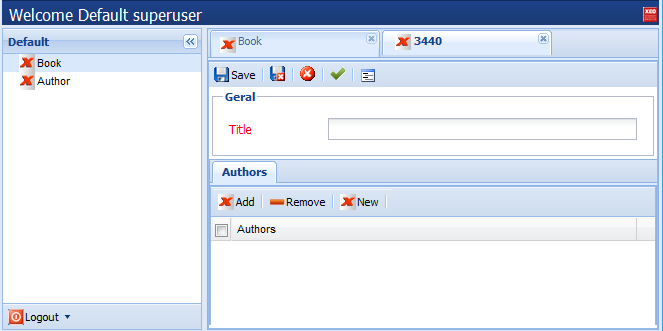
If you look at the authors "tab" (in figure 7) it depicts the 1:N relation of Books to Authors. This allows you to associate existing authors with the current book. If you press the "Add" button, a viewer to select (Lookup) Author instances will appear (again, in your case the list will be empty, but, to illustrate we created J.R.R Tolkien) as depicted in figure 8.
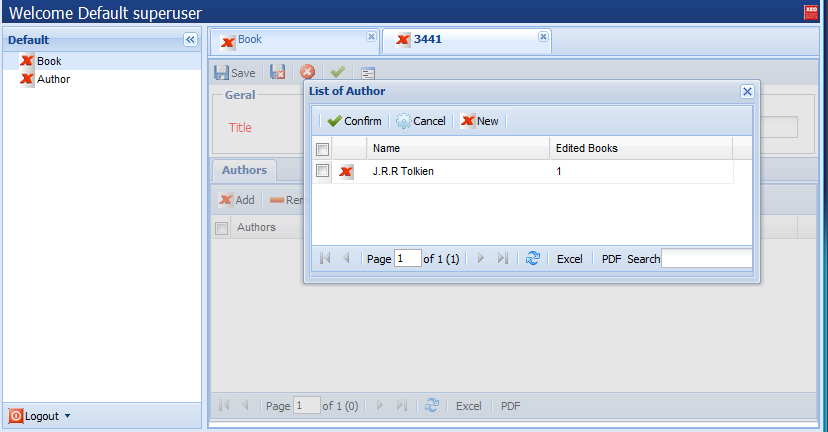
Notice that the behavior code was already executed, notice the "Edited Books" column in Figure 7, which has value "1". This is because the onBeforeCreate event was executed and when the Book instance was created it automatically increased the number of edited books.
You could also create a specific Java Bean to support any of the viewers. You could, for instance, create a Java Bean to support the edition of a Book instance and override the method that is associated to the remove button to perform some checks, or, if you want to disable the ability to remove, edit the properties of the toolbar component and make the remove button hidden.
You could also create a specific Java Bean to support any of the viewers. You could, for instance, create a Java Bean to support the edition of a Book instance and override the method that is associated to the remove button to perform some checks, or, if you want to disable the ability to remove, edit the properties of the toolbar component and make the remove button hidden.
You can learn how to do that in the documentation page
.


